SAFIERY UNIVERSITY
FAULTLESS WATER CAPACITY
CONSERVE AND MONITOR
This article gives insight to getting the most into your water tanks and then monitoring them accurately to conserve water.
1. Getting the most water into your tank
-
RV water tanks by their very nature have a large flat profile, particularly towards the top of the tank under the chassis/floor.
-
The volume between the breather tube outlet, inside the tank, and the tank “inner roof” will be air and not water.
-
Therefore the closer the breather tube to the top of the tank , the more water can be carrier inside.
-
When filling the tank, if the caravan/camper is being filled with water and the breather tube is on the side closest to the ground, then you will get less water into the tank. Reversing this situation will get more water in.
2. Getting the most water out of your tank
-
The drain position is also a factor in getting more out of the tank. The higher up the side of the tank, then more water is left inside.
3. Usable Capacity
There can be significant differences between the theoretical capacity of a water tank and the usable capacity.
Determining the usable capacity is easy.
-
Purchase a low cost water filling meter. (Bunnings have one for $60)
- Drain the water tank on level ground.
- Fill the tank and measure with the meter until the breather is overflowing just a little.
- Take the meter reading and subtract a litre of so for the breather tube volume and overflow.
Now you have the maximum usable capacity of your tank.
4. KNOWING THE AMOUNT OF WATER AVAILABLE IN LITRES
This is the hard one for most systems. The reason is:
- Level measurements are used that can be linear in a non-linear tank volume.
- Level sensors fail or give faulty readings
- There was no original calibration by the manufacturer and the tank reading are an estimate.
SIMARINE solves these problems in a simple and clever way using Artifical Intelligence.
There is No problem with the water volume remaining estimate in an unusually designed water tank.
For each change of water level sender point (if fixed measuring level points), you enter the volume of water change in litres against a calibration value.
Use one of the simple filler meters and enter the litres for each sender point.
- Watch the reading level jump when a sensor point is touched by the water
- Pick a similar interval change for the calibration if a variable analog sensor is used.
- Dont be concerned about having exact interval points on variable level senders (explained below). The system will do the smarts for you.
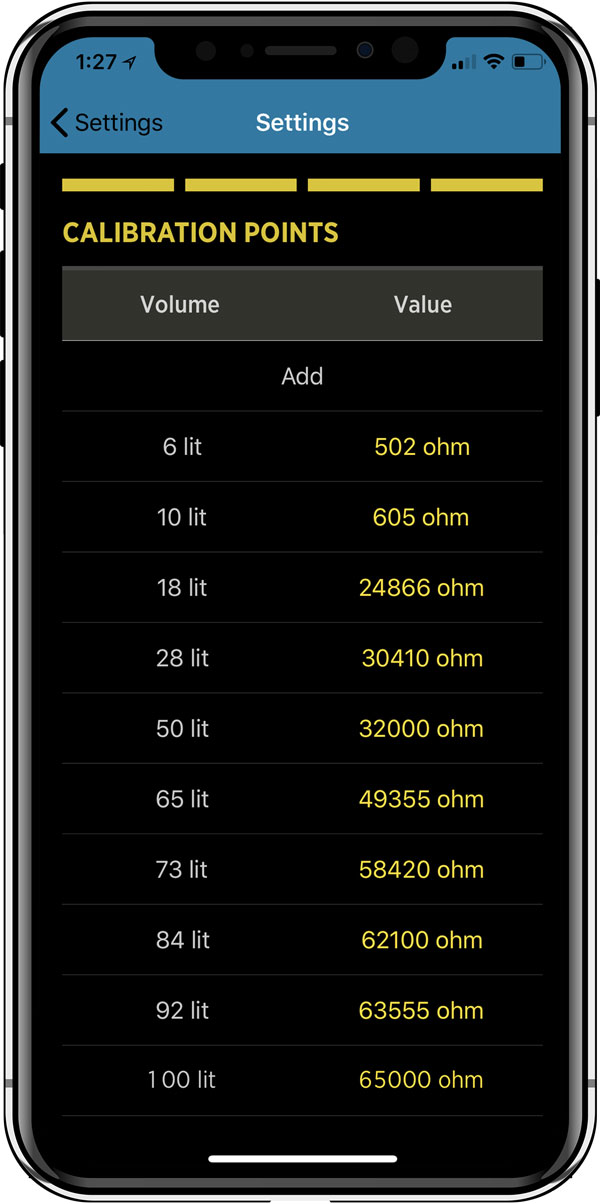
SIMARINE HAVE UP TO 11 CALIBRATION POINTS Between “full” and “empty” :
- 11 calibration points that can be added.
- View the list of calibration points for a tank and add new calibration points or remove existing ones.
- More calibration points will enable PICO to show tank level more accurately.
- For each calibration point, tank fill volume and a corresponding sensor value (resistance or voltage) must be set.
SIMARINE then calculates the estimated volume change between each sender point and uses a unique change variable.
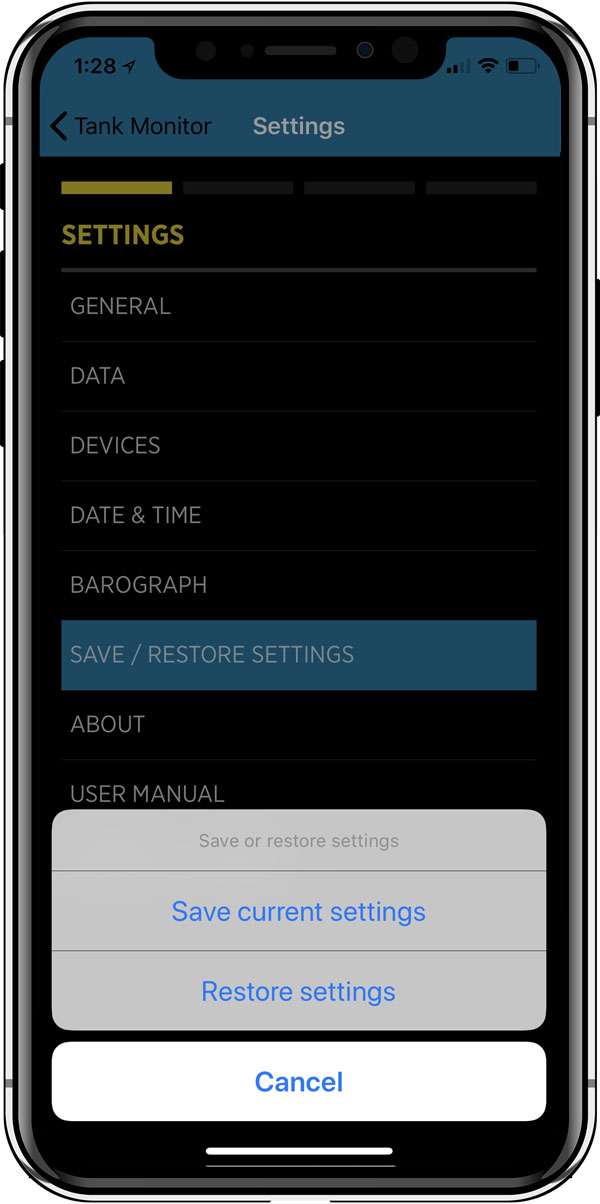
SAVE SETTINGS ON YOUR PHONE
SIMARINE has a great feature of saving the settings to your smartphone.
TANK LEVEL SENSORS – KEY to success!
-
Sensors that have a constant output like pressure based level sensors or ultrasonic level sensors will give you the best resolution.
-
Accurate level sensors using pressure signal
– these are very compact: 304 Stainless body, 21mm dia and 24mm long
– the are DIFFERENTIAL pressure sensors that compare the tank level “pressure” to the outside air “pressure”. Poorly designed product doesnt have this feature and will give false reading at altitude and changes in barometric pressure. All our sensors are differential. -
-
Install in one of 3 locations, always at the lowest point on the side of the tank:
– drill and tap the drain bung, this is generally 3/4inch BSP and place the sensor in here. because of the flexible cable, you can generally remove the bung without having to remove the sensor.
– drill and tap the side of the tank at a thick section generally in the corners and place the sensor in here.
– add a T piece from the drain to tap section, position the sensor in the T branch at any orientation (like vertical).
-
-
Ultrasonic sensors:
– have a “dead band” when the tank is nearly full
– can give a false reading if the model chosen is not matched to tank shape
– can give a false reading when the tank is empty because of signal bounce. -
Plug or “arm” sensors have low resolution of 3-5 points.
– calibration can still be useful and an improvement over the normal 4 LED tank guages
– calibrate at the sensor change points for best results.
– here is the interface module for these to simarine . It will support up to 3 tanks with the RV arms already fitted. Just wire from the RV srms to the interface module for up to 3 tanks. The interface module converts the resistance signals to the Simarine system.
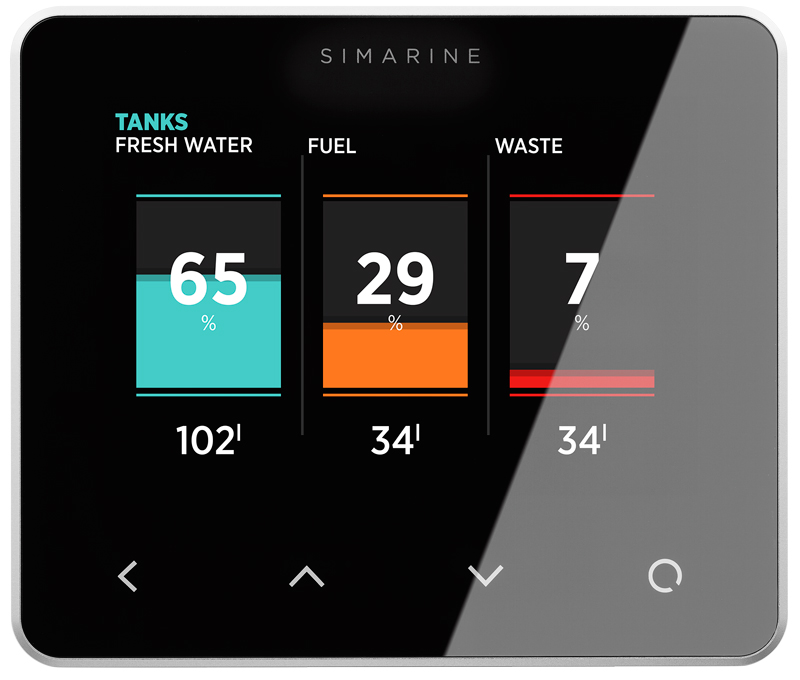
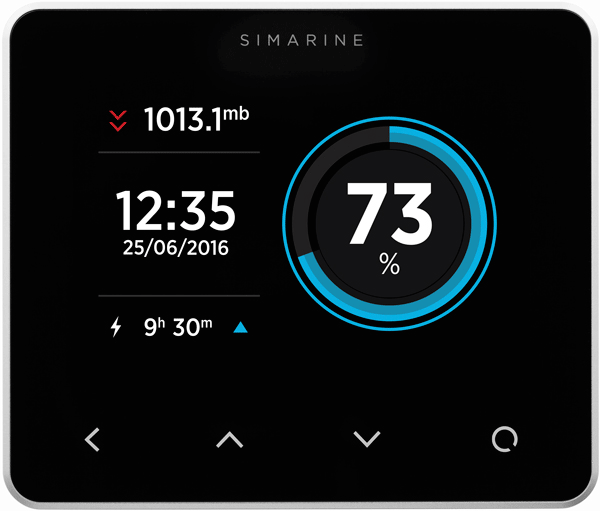
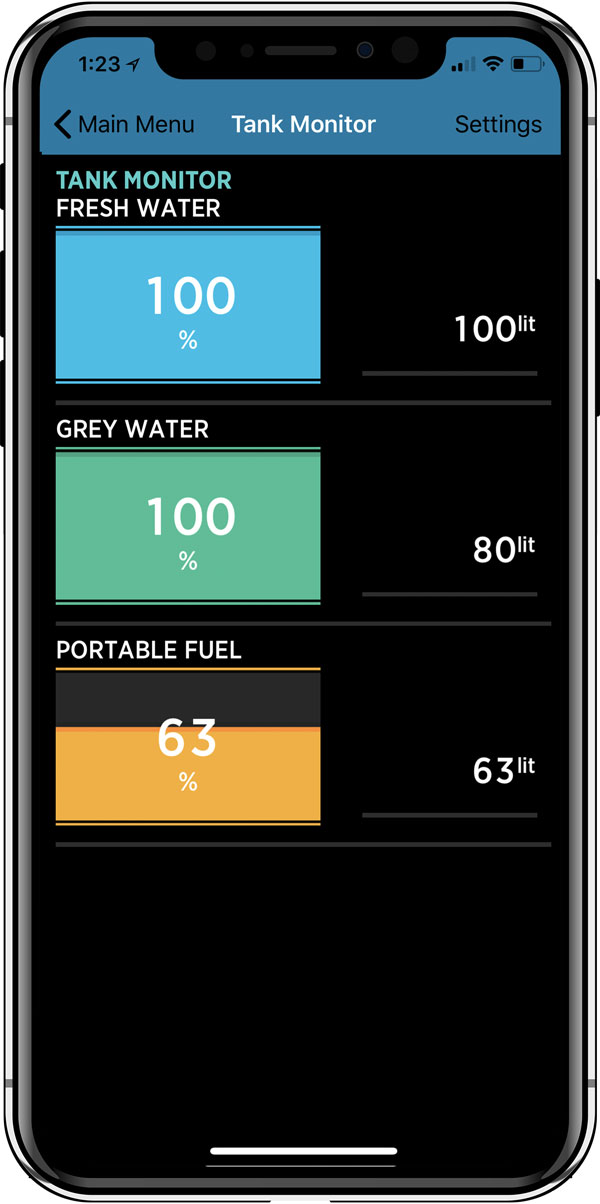
SIMPLE CLARITY
-
Big clean clear display on PICO and smartphone.
-
No small LED lights or buttons to push.
-
Easy to read Total with multiple devices installed.
-
All the device currents on the battery screen.
EASY TO SET WATER LOW ALERTS
-
Change alerts based on the camping or boating conditions.
-
Do on the smartphone with a simple select and slide.
-
Set alerts to visible, audible or both.